Sunday, April 7, 2013

New Scrap Projects

How much goes on in 2-1/2-years between posts!  Time truly slips away when you don't keep a visual record of the happenings. 

In September of 2011 our quilt group began making placemats to be sent out with our local Meals on Wheels program.  With 450 meals bring delivered on a daily basis, we'll never run out of recipients for nice home-quilted placemats.  The first year we delivered over 200 mats. I have a huge pile that are pieced and ready for the finishing stitching. and a larger pile of wonderful fabrics and orphan blocks waiting for creative joining. 


These are a small sample of the mats I have made.  It has been enjoyable to combine prints with design and have something completed and useful in a short time.

Most recently I have been working with the Mock Log Cabin design.  Our quilt group celebrates National Quilt Day with a day-long community service sew-in.  I selected this design to work with as it can be made with scraps.  We cut squares and triangle units in advance, and sewed and squared the triangles so we could stitch blocks at our Celebration.  The divided 9-patch square can be set in all the log-cabin variations.  This quilt top is one I made  using reds for the center squares of each block.  With a few hundred squares not yet sewn we will be making lots of these quilts!
I have many sewn triangle units and have been looking at a variety of quilt designs that use triangles like ocean waves and baskets.  Will these triangles be cookies or milk?  And what about leftover square?  Scraps are endless! 


Monday, September 13, 2010

I Am Still Using Scraps

It has been a long time since I have made a posting, but I truly have been working on my scraps.

I had a dear quilting friend pass away almost two years ago, and I have received a great deal of her fabrics from her family. I have decided that I am a "topper" and need to work harder at the finishing part of the process. I love the creating of the multi-fabric designs. However, starting near the first of the year I have been working on sixty-degree designs, lots of string variations, and little else.

I started working with a Moda American Jane pattern called "Pretzel." I was intrigued with the design and was very interested in it. I had hoped for an easy strip-piecing type of assembly. No, traditional y-seam assembly was required. I instantly re-sized the design as the 2-1/2-inch strips seemed large for the variation I was working on, so I cut from 2-1/4-inch strips. Then I had to change the hexagon size. I hand-pieced the first variation, then decided to hand-quilt it, too. With my deterioration of vision and agility through the past few years, the black on black quilting may not have been the best idea. From across the room it doesn't look too bad, and the stitching doesn't show much, so after adding a binding it will be ready for the wall.

I received a box of 2-inch strips from the family of my friend, and after cutting two 6-point star variations from them I had enough red and black strips for two quilts in the Pretzel design. I made one variation that I appliqued to a background, and a second set have been appliqued to blocks.


This small lap quilt is ready to be basted for the quilting.

With another pile of the two-inch strips I cut hundreds of diamonds. I am working on two tumbling block variations, one with 9-patch blocks and one with 25-patch blocks. I have the 175 required 9-patches pieced, ready to be pieced into blocks.

I took a large pile of the scraps that I had been given and cut 2-1/2-inch diamonds, and my quilt group started piecing a tumbling blocks variation. This top is the one that is ready for quilting:


I am working on 19 other quilts with the leftovers--more cookie and milk quilts. Twelve tops will be baby quilts with a stack of the blocks in the center. The other seven are variations, each one different. Am I out of diamonds? Hardly!

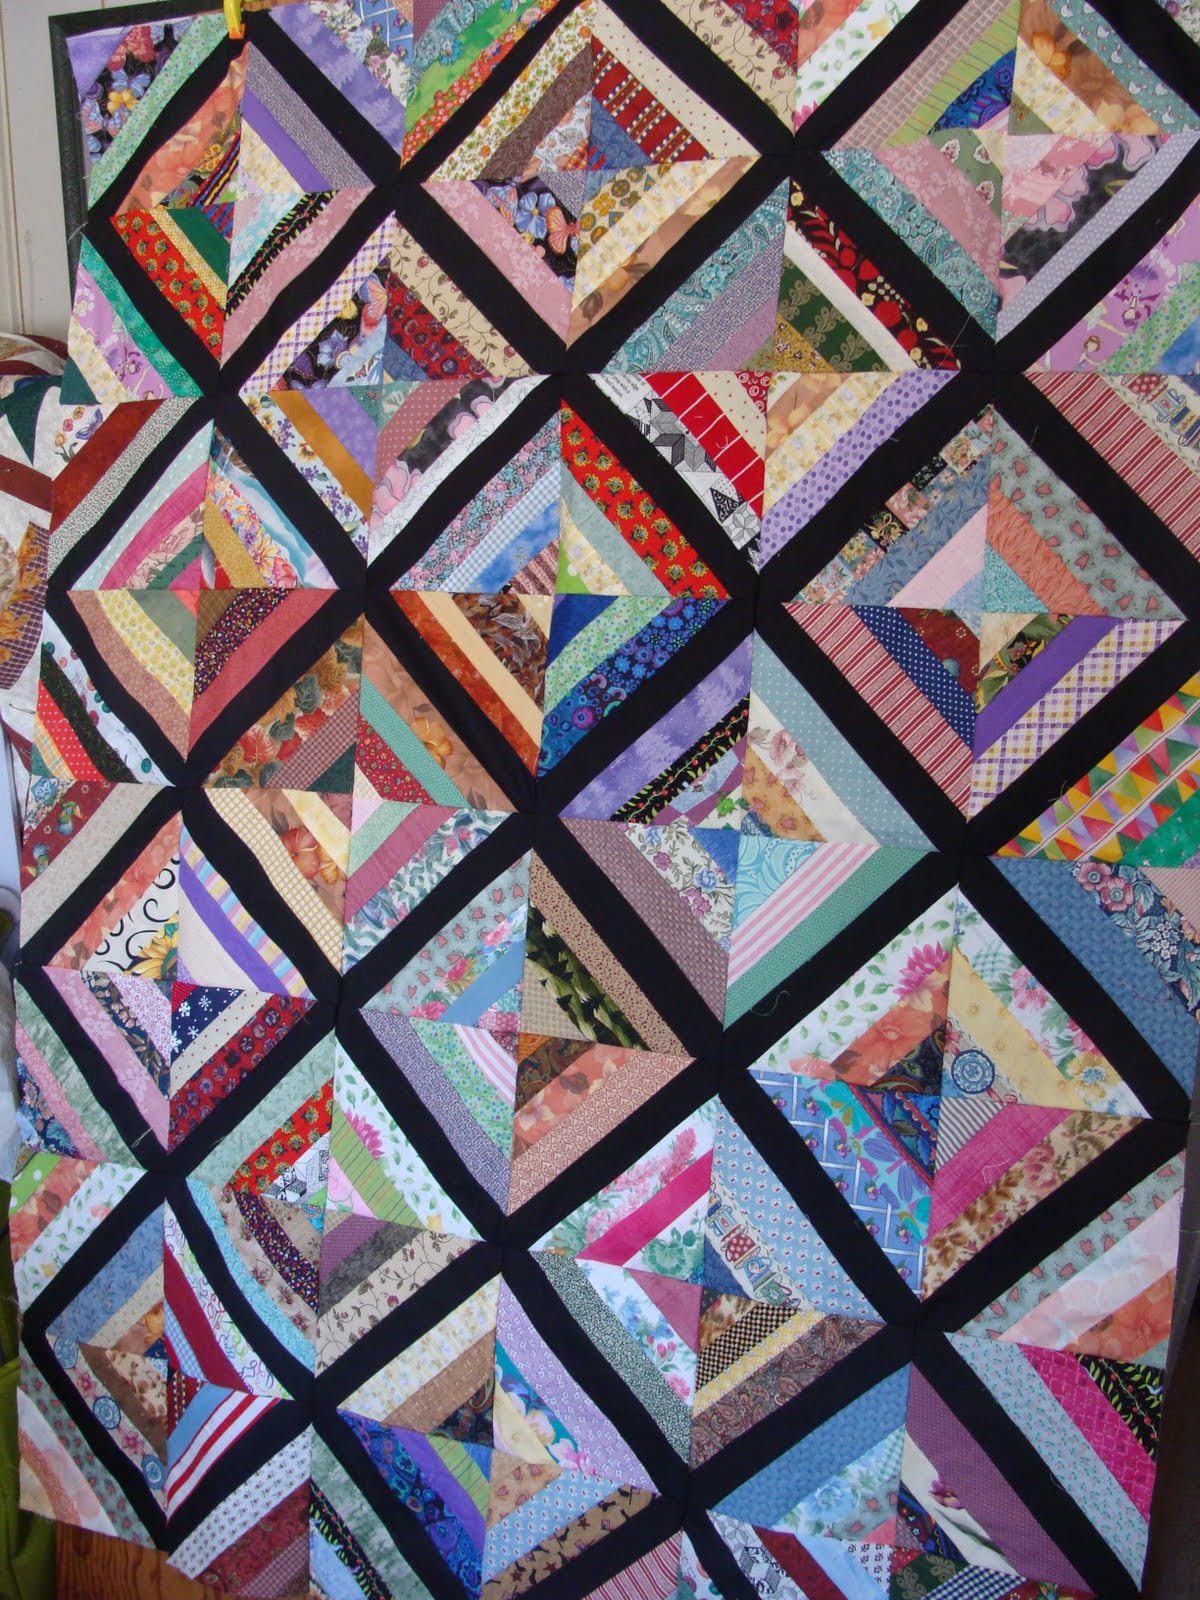
I cut leftovers into strips for string variations. Longer strips are used for diagonal piecing, and short strips I stitch into spiderweb designs. These tops are ready to be basted for quilting:

It is impossible to be out of strips. There are many more string quilts coming.

Our quilt group has decided to use the Bonnie Hunter Pineapple Blossom for our retreat design for this year. Time to get out the ones I have in progress and cut the new ones I want to do. And from the leftovers from those quilts....

Friday, July 24, 2009

A Finish Again


Dishrag Soup -- My Version

For the 2005 fall retreat of New Friends Quilt Circle the commercial design called Dishrag Soup was selected for the group project. Necia Doty had previously completed two colorway variations of the design which were very appealing to the group. Although patterns were ordered from the California designer for the retreat participants, New Friends were preparing for our annual quilt fair in the following month of March and had just completed an exchange of fabrics for nine-patch units. Since the size of these unts was already determined, I decided that I would use what I had and designed the rest of the quilt to fit them.

I selected fabrics that "read" as red for the churn dash part of the design, and fabrics that read as blue for the quarter-square triangle units. I selected nine-patch unts that had light corners for the centers. A single background fabric was used. Most of the print fabrics were sample fabrics purchased or donated to me. Everything, including the back, were stash fabrics. I turned the backing fabric inside out as it was a white on navy print with too-high contrast for my taste.

My 12-block set made a nice large lap-size quilt with 4-ounce polyester batting being used as the filler. The quilting was done with mono-filament nylon thread on my Juki machine and red solid fabric was used for the binding.
The quilt was on exhibit at our 2009 Steel Days quilt show, and following the show was ready for donation in our quilt group ongoing community service.

Friday, March 20, 2009

Progress on Old Project

In December I got out a very old project, started years ago while teaching at a quilt shop and rescuing fabric scraps from the waste basket for scrap quilts. This Joseph's Coat began with the templates from an Oxmoor House series publication which included the plastic templates with the instructions. I used these scraps for the ovals, and began on the journey to hand-piece a quilt top. When I got my pieces out I found I had about 3 circles pieced together, and a pile of cut out shapes.

I cut many more pieces in December and January, and then began to make units of 3 ovals with a center, mixing all of the old pieces I had cut in with the new ones so they could be scattered throughout the quilt top. It's interesting how fabric styles and colors change and how ones collection of scrap fabric differs through the years.

This week I was finally able to finish one row of the quilt (of seven) and got it pressed. Through the years I have learned much more about seam allowance and how to get my points more sharp. I was amazed that the row lies quite flat (so far) and that I just might be able to make a success of this quilt.
I have it flat so far, and for the most part the colors are working together. I have more work to do in getting sharp points, and I will gain plenty of practice as the quilt progresses. I'm very slow at the stitching, but only one can be taken at a time, so stitch by stitch, I'll continue on.

Tuesday, March 17, 2009

St. Pats Day

I called my family in NH tonight to check on healing from surgery on my Son. My little Sofia told me that I had forgotten to mail them something. I asked what, and she replied I had forgotten their pillowcases. Mom. Joanna, said that nothing had been said to her. I'm glad that the children are looking forward to my pillowcase gifts, and that is the good news. My injury prevented me from stitching out the designs I had created, and that is the bad news. However, there will be a St. Pat's day next year, and that, too, is good news! Meanwhle, another holiday is coming, and I purchased the "perfect" fabric for new sets of pillowcases. They'll be welcome when mailed to NH a coming spring day!

Monday, March 16, 2009

March-ing Along

My granny square odyssey is continuing, and I completed my 6th afghan last week. With a huge plastic storage tote full of completed squares, I have plenty to keep my busy as I stitch afghans together. I have purchased all the black yarn in one JoAnn Fabrics and two WalMart stores now, and it's almost time to make the rounds again.

Winter is slowly changing to spring, but we can never tell what season it is. Just as I have been getting anxious to start digging in the dirt again I had a fall (not that unusual), but pain has kept me confined. I've been happy to have those squares near by to work on.

A quilt celebration project has been my main focus for the last few months, and I have five new quilt tops ready to be basted and quilted. I designed a sampler with large scale blocks to feature novelty prints. A day-long public invited sew-in was successful and pictures can be seen at www.newfriendsquilters.blogspot.com.


The fabrics shown in the corner will soon be used to create similar quilts. The baby to lap-size quilts are all to be donated along with others made by our quilt group.

A quilt group associate commented that she likes my idea of "cookies and milk" and is starting to cut multiples of blocks while she has the fabrics out. She has decided that two blocks made alike at the same time makes for more quilts much more quickly. She's adopting my "use it up" theory, and in the pictures (link above) she has a stack of her quilts made with sampler blocks to show the results of her work.

I look forward to warmer weather and the ability to sit at the machine again. There are quilts waiting for me!

Monday, February 16, 2009

Is Winter Almost Over?

This time of year is hard with re-occurring winter depression and nasty weather that keeps me confined, neither condition that I have any control of. Daylight lights and plenty of projects to work on keep me marginally functional during the winter months.

My piles of pieced blocks are growing, and I have quilted 4 quilts with two more in process. A couple of days binding and I will have something to photograph.

I pulled out a box of granny squares I had set aside some time ago, and found that I had several variations in progress. A friend had volunteered at a thrift shop several years ago, and when incompleted crochet projects came in she would purchase them and bring them to me. Needing some hand-work to keep my hands busy in spite of my mood disorder, I started to count, and arrange.

I hate, I mean HATE to weave in ends, and most of these squares had starting and ending yarns not worked in. That was depressing on its own! However, I spent two days and got all those ends woven in with a needle, and clipped neatly. I made 4-patches of the small blocks and bordered them. I accidently turned the top twice as I was doing the assembly, but the accidental placement looks better than how I had planned it. This oversize afghan would have been made smaller, but when I tried to take some rows out my stitching (in the black) was so good I couldn't see it well enough to take it out, so there it stays. This cuddle-couch cover-afthan is ready for donation.

I finished one slightly smaller afghan, not yet photographed, and am in process of the 3rd, with squares ready for assembly for the 4th.


My grandchildren received their Valentine pillowcases in time to use them before the holiday.
Embroidery on both sides of the pillowcase cuff challenged me for a couple of days. I'm still struggling with placement and correct stabilization and tension, but I guess little kids don't notice that so much. Another season is in the planning as spring should be here before too long!
Although these projects are not scrap "quilts" they are start of the C&M theme--there is more yarn and squares to be used, and there are scraps of the bright print fabric waiting to be used!

Friday, January 9, 2009

2009 Quiltmaking

I have not posted for a bit, but I have been sewing. The 2009 Project Linus block from Quiltmaker magazine has kept me quite occupied, and I have approximately 150 blocks done. I have to do more cutting of background fabric to continue on. Pictures of my progress will be coming at a later date


I have been concentrating on stitching up pinwheels from that huge pile of trapezoids in my stash. Pictured here is the pile upon which I stitched triangles to the end. It took 5-1/2 hours to clip them all apart and press the seams, and to stack them up into sets of four pieces.
I recently was asked to teach some beginner quilters, so I nade some stiletto tools from bamboo skewers for them. I used polmer clay to make a topper, and used a wooden spool wrapped with thread for decoration. It gives just enough weight to the top for it to handle well, and keeps it from getting hidden under my fabric as I sew. Two of my favorite uses is to help me separate fabrics from a pile of cut pieces, and to help me keep my seams aligned and facing the correct direction while I sew. There is no scratching of my machine bed or damage to the machine if a needle should accidently hit it.


I have stitched up 55 blocks now, but have barely started on the pile, so there will be many more to go. Pictured below are the steps to creating a block:


A final pressing and the block is done. All seams were pressed to the dark. Sorry about the colors which in the last pictures got reversed--I turned the block when I stitched it and got the seam on the wrong side. It didn't matter--the block finished up the same. My blocks finish at 8-inches. I've done some sample sets with my EQ software, and believe that an on-point set looks the best. Hopefully I will soon have some nice quilt tops to share.

Monday, December 15, 2008

More of those T's


Here are the last of the braid quilts. When photographing them a friend commented that she didn't like the bright yellows in the braids, and she said they seemed to jump out. I don't think that is the whole problem. I think the yellows are too close in value to the muslin background and they disrupt the design, leaving a "hole" in it. I think your eye goes there because it is drawn to the disrupted part of the design.

I stitched up all the old leftovers of trapezoids that were facing one direction into picket fence blocks.
I have tried to use the yellows in the center section of the blocks so that I won't have the same problem with this quilt design.

Part of my purpose for starting this blog was to share some of the tools and tips that help me in my scrap work. There was a real challenge in squaring up these blocks. They should be 6-1/2-inches, but I had to square up to 6-1/4-inch. When working with a block that is divided as this one is, cutting off the outside can lead to elements not matching up when stitching the blocks together. I was fortunate that the center section was just a bit smaller, too, so I used a square-up ruler which I remarked with a red permanent pen. I marked where the center secition of the block needed to be, and used the diagonal line on the ruler to position the ruler on the diagonal of the center of the block. To square up the second side of the block the block was turned and not the ruler. I marked where the new outside line would be so that I was not having to hunt for it when cutting the second sides of the block.

My messy pile of blocks has grown in the past few weeks until after stitching all one night (SADD dysfunction) I decided I had enough of these blocks.

After they were all pressed and squared up I counted them--245-and here's the kicker--just enough to make 5 quilt tops with no leftovers!
I'm stitching the blocks into pairs, then foursies, then into sets of 3 x 4 quilt tops. Meanwhile, back at the machine...


I took a class from a noted national teacher who had designed a set of rulers that worked together to cut very wide strips. When students asked her if she wouldn't put out a shorter 12-inch ruler she touted that she would not as her rulers were not designed to "work that way." She later did produce this very ruler, and I have used it a great deal in my work. Rulers may be designed for one purpose, but should not be so limited as this instructor saw them. I often use rulers designed for one purpose to meet another need.


I have had to cut more trapezoids as my color selection was getting too thin and needed to add some more so that what I had cut was able to be used. I chose to use this EZ International ruler made to cut diamonds to make my diagonal cuts easily. I used freezer paper taped to the ruler so that the ruler could be aligned with the strips that I cut. The ruler was rotated for angle and straight cuts along the strip.
Permanent pen marks are easily removed with rubbing alcohol, and paper pieces can be removed easily. There are many useful tapes available for marking, but I find they move too easily when many repeated cuts are required and often do not show up as well as my eyesight requires.

Monday, December 8, 2008

Trapezoid Fever

In 2001 the quilt market was flooded with tin cans packaged with 2-1/2-inch strips of fabric called "worms" as a result of Debbie Caffray's book "Open a Can of Worms" featuring scrap look designs using these strips. Today it's "Jelly Rolls", but the idea is the same.

Our quilt group had a year-long exchange of "worms" where we had a planned theme of prints or colors for each month's exchange. After a year of collection, we each had plenty of fabrics, so we started to use one of the quilts in the worm book each month for our community service project and at the same time learn the techniques for each design.

My records show that in March of 2002 I presented the "Friendship Braid" pattern. After completing one top I set aside the pieces I cut until I uncovered the stash last month. OH MY! I had a huge shoebox full of cut pieces, both of prints and muslin for background, and a large pile of strips sewn together. Since our monthly quilt group challenge was trapezoids, I decided to accept the personal challenge and use up my stash of cut pieces.

I discovered that I needed to piece a few more strips to have enough for three quilt tops, so piece I did. I really did not enjoy the joining of the strips or adding sashing as all of the outside edges of the strips were on the bias. I have decided that I will work with the "Picket Fence" design that I started before the pieces were put away years ago. I must have tired of the braids and the bias edge even then.

I have completed three braid tops now, and they are ready for quilting. I think I really must stop piecing and quilt! The first top I made six years ago is not quilted, either. Although I am not done with trapezoids, I am DONE with this pattern for braids.
I had torn yards of stripe fabric that had been donated to our group into strips of various widths due to the type of print, so had plenty of fabric to set all of the quilts. In fact, I'll have to come up with something else to use all of these strips up! But all those strings from the torn edges! My sewing area is a mess with dog ears and strings. I'll think hard before sewing hundreds of trapezoids and tearing yards of fabric again.

Trees Again

Here hang seven beautiful autumn tree quilts ready for quilting. As I reported in an earlier post, our group has been working with a new technique each month, and trapezoids were the challenge for October . I designed the block and wrote the instructions to go with the pattern and then started to cut for a sample quilt. Did I write "a" sample quilt?
The trouble is, when you get out a piece of fabric, cut out a few pieces, fold it up and put it back, the whole process has to be repeated over and over until that piece of fabric is used up. That is a huge waste of time, especially when you are wanting to use up the scraps and get nice quilts done at the same time. So, the result is the seven quilts you see here, an 8th new one now hanging, and a 9th on the way because some blocks were left over or squared up too small. The blocks are cut and will be stitched soon.
A photo of a tree in my front yard shows that the traditional "pine tree" shape works to represent the autumn theme by use of other colors, even though a shape that represents another type of tree was used in the quilts. It's amazing to see all the qhilts hanging in one row and view all the colors and fabrics used that one would not think of as representing "trees."


You will notice that not all of the trees are alike. When I started to run out of a fabric so that I did not have enough for four tiers of trapezoids, I just cut a wider top and loger trunk. The ladies in the quilt group did not notice that right away, and it was quite a surprise when they discovered the changes. They were subtle, but provide more interest in the quilt top.
I stitched up about 130 of the tree blocks during the month, and I amazed myself with what I got done. I should almost be a master at trapezoids now, but I'm not. I need to get out that "point trimmer" from my notions box to inprove accuracy.
I used donated quilt room fabrics and stash to make the tops--and it did not seem to dimish the pile at all. Why is that?

Saturday, November 22, 2008

Autumn Sewing

I found this delightful pre-print while shopping with a friend in a local fabric store, and just couldn't resist it. I found a piece of blue solid that matches the background, and did some outline quilting by machine. I even added a spider-web to the quilting. I bound it in a solid black. It decorated the walls in the New Friends quilt room for the fall season.
A few years ago I learned of the "Picket Fence" at a guild meeting in Provo, Utah. I was just learning to use my quilt software and started playing with value shadings. When I came upon this shading, I saw dancing monsters and "had" to create one. The orange I had just purchased because I liked it, the yellow and black were leftovers from something else. As the design "came to life" I added buttons for eyes. I hung the completed piece in our group quilt room and had the ladies suggest names for the quilt. We had a vote of the group of my favorite names. I didn't make the label, so I don't remember the selected name, but one of my favorites was "Mrs. Arachnids Garden Party." Fortunately, in my files are the ballots and the chosen name, so I can still label the quilt properly. It is fun to get it out at holiday time. It is a quilt that is never missed visually.
The scarecrow is another "cheater" that I loved. I have been a "crow" collector, and this print was appealing because it can be used all fall season. I did a quick-turn of the backing, front and batt, and then hand-stitched down the backing and batting all around the edge so that the backing would not roll to the right side. I did some outline quilting with monofilament on the top. I forgot to change the bobbin thread, so it has crayon-colored variegated thread on the back--not that it matters at all. Tubes on the back hold dowels that will keep the head upright and the arms extended. I was rather pleased that I got both of the pre-prints completed in-season this year!
The small pumpkin wall hanging is a design that was taken from an instruction book a few years ago; a project that was presented as a quilt group workshop. I had the top finished except the border for a couple of years before it was finished . I have another waiting for border and completion that I made at the same time. I guess I need a recipient and a deadline to get going on the completion.
I will take them all down on Tuesday, as it will be the last group meeting for this calendar year. It's time to go through the quilt collection and find something to hang up to start the new year. The theme for our instruction this coming year is "Everything Old is New Again" so maybe this is time for some of my old uglies?